Picture10 hollow hold.png

The Hollow Hold Progression

The Hollow Hold is a functional core position that is seen in many different exercise movements and athletic training programs. The position itself can be used as an isometric exercise or as a bracing technique during dynamic movement.

For those who are not familiar with the hollow hold position or are unable to maintain the position, there are variations of this exercise that can help develop the proper strength and technique to eventually be able to perform a hollow hold.

Picture1_hollow hold.png

Why should I care about being able to do a hollow hold?

- It can improve your ability to maintain good trunk control on the bike while pedaling at a higher RPM or higher resistance

- It allows you to adequately brace your spine while generating powerful or fast movements with the arms and legs such as running uphill or performing pull ups

- It can provide protective benefits to your spine, hips, knees, shoulders, and elbows with regular daily activities.

Points of Performance

  • Start in tuck position:
  • o Low back flat on the ground
  • o Hips and knees flexed to 90 degrees, shoulders flexed to 90 degrees
  • o Chin tucked & neck elongated
  • o Shoulder blades lifted off the ground
  • End position:
  • o Maintain the low back flat on the ground, scapulae elevated off the ground, chin tucked
  • o Slowly extend each leg straight out, knees fully extended, toes pointed
  • o Slowly lower each arm back until in line with the ears
  • Tips:
  • o Think about drawing rib cage down
  • o Squeeze thighs together
  • o Maintain knees and elbows fully extended
  • o Do not hold your breath
Picture2_hollow hold.png
Picture3 hollow hold.png

Common Faults in the Hollow Hold:

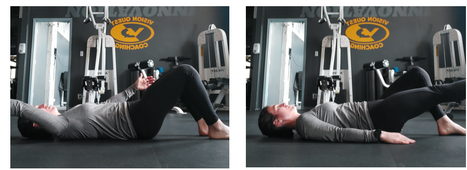
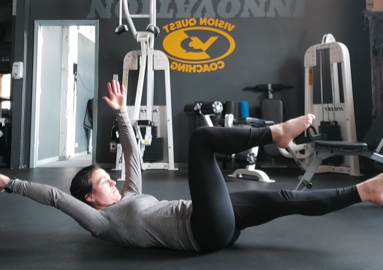
Extended lower back: If you are unable to maintain your low back in contact with the ground, you should not continue with the hollow hold or progression exercise at that time. You may either be too fatigued to complete the exercise that day or you may need to scale back to a previous variation until you have developed enough strength and control at that level.

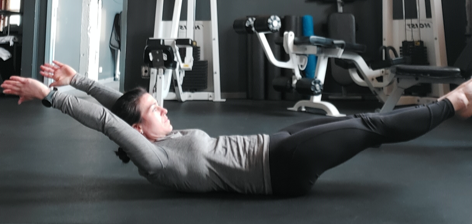
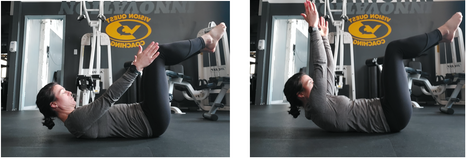
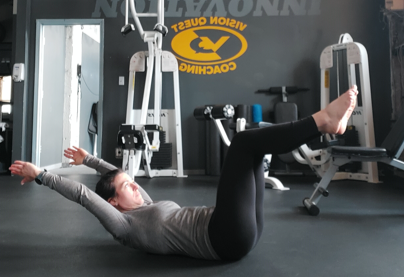
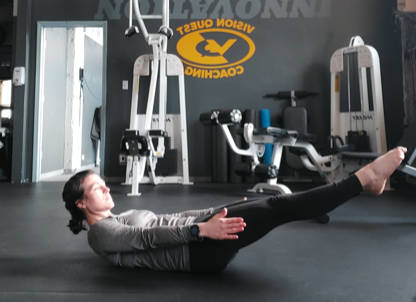
Flexed knees and elbows: The goal of the hollow hold is to maintain tension of the core with extremities fully extended. If you are unable to maintain knees and/or elbows in full extension, scale back to one of the previous progressions until you have developed the strength and control you need at that level.

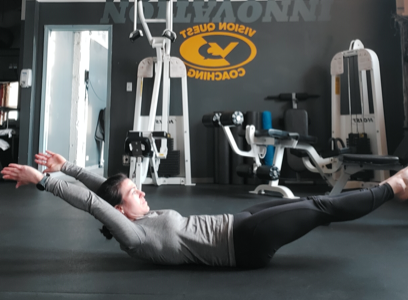
Extended Neck: Deep neck flexor muscle weakness is extremely common. Inability to maintain the chin tucked toward your throat/chest can lead to muscle strain. Depending on how weak your neck muscles are, this may take more time than your abdominals to develop. Practice earlier progressions to develop neck muscle endurance in the tucked position before moving to the next level and increasing the load.

Holding your breath or Valsalva: THIS IS IMPORTANT AND APPLIES TO MALES & FEMALES. For the sake of your innards and pelvic floor muscles, it is important to avoid holding your breath, bearing down (pushing out), or distending your stomach. If you are really struggling to breathe or feel yourself pushing out, then it would be wise to scale back to the previous progression. Focus on developing your endurance at an easier progression while maintaining a normal breathing rate with less effort.

Exercise Progressions: 6 Levels

Developing core strength is a process. Skipping steps in progression will only limit your ability to progress other movements that require hollow hold strength. Regardless of where you are at, practicing core strength exercises with proper form will bring noticeable benefits to your performance.

Build endurance. Prior to progressing to the next level exercise, ensure that you can perform the current exercise with proper technique and control for at least 30 seconds. Don’t expect to immediately be able to perform the next exercise for 30 seconds. Start with 5-10 second holds and progress at your own rate. Again, it is more beneficial to maintain good form and technique than try to move faster than what your body can do.

There is no perfect formula for progression. Your rate of progression is completely dependent on your prior exercise experience, your ability to learn and implement the proper techniques, lifestyle factors (sleep, recovery, fuel, work stress), and your exercise routine that week/day. If you did a hard strength workout the night before, had a bad night’s sleep and then went on a hard threshold ride with Dave this morning, you may not be able to perform the same progression level that you could a few days prior. Don’t beat yourself up about it. Find where your body is that day and start there.

Picture4 hollow hold.png

LEVEL 1: Abdominal Isometric Brace

  • Chin tucked towards throat/chest (use pillow if needed)
  • Ribs tucked down & low back flat on the ground
  • Hold position and breathe comfortably for up to 30 seconds
Screen Shot 2022-01-12 at 10.53.19 AM.png

LEVEL 2: Abdominal Brace with Arm/Leg Extension

  • Maintaining abdominal isometric brace as outlined above
  • Extend one leg out straight or the opposite arm back
  • Another option is to extend opposite arm and leg out
  • Hold position and breathe comfortably for up to 30 seconds
Screen Shot 2022-01-12 at 10.54.50 AM.png

LEVEL 3: Abdominal Tuck Isometric Hold

  • Head and shoulder blades lifted off the ground
  • Chin tucked towards throat/chest
  • Ribs tucked down and low back flat
  • Hips/knees flexed to 90 degrees
  • Shoulders flexed to 45-90 degrees (45 degrees = less resistance, 90 degrees = more resistance)
  • Hold position and breathe comfortably for up to 30 seconds
Picture7 hollow hold.png

LEVEL 4: Abdominal Tuck with Arm Extension

  • Maintain abdominal tuck as outlined above
  • Extend both arms overhead to ear level. If you cannot maintain your low back with both arms back, try one at a time.
  • Hold for up to 30 seconds.
Picture8 hollow hold.png

LEVEL 4: Abdominal Tuck with Leg Extension

  • Maintain abdominal tuck as outlined above
  • Extend both legs straight out. If you cannot maintain your low back with both legs extended, try one at a time.
  • Hold for up to 30 seconds.
Picture9 hollow hold.png

LEVEL 5: Abdominal Tuck with Opposite Arm/Leg Extension

  • Maintain abdominal tuck as outlined above
  • Extending one leg fully with toe pointed and simultaneously flex one arm back to ear level
  • Hold each rep comfortably for up to 10 seconds. Alternate 3 reps per side.
Picture10 hollow hold.png

LEVEL 6: Hollow Hold

  • Maintain abdominal tuck as outlined above
  • Extend both legs fully, one at a time
  • Flex both shoulders fully, one at a time
  • Maintain points of performance as outlined above
  • Progress to 30 second holds